How to Record Screen with OBS on Windows, Mac, and Linux
There are multiple ways to record your screen, be it Windows, Mac, or Linux. But no software comes close to OBS (Open Broadcaster Software) when it comes to smooth operation and reliability. So, to make it easier for you, we have compiled a guide to explain how it works. Here are all the methods to record your screen with OBS.
Table of Contents
Method 1: Record Screen with OBS on Windows
Let’s start with the most commonly used platform, Windows. Since OBS has no restrictions on Windows, the steps are pretty straightforward.
Install OBS on Windows
There are two ways you can download and install OBS. Go to the OBS official website and press the Windows button. Once done, follow the basic installation steps. You can also go to the Microsoft Store and search OBS Studio, which will give an install button. Once you press the button, OBS will automatically install in your system.
Change OBS Settings
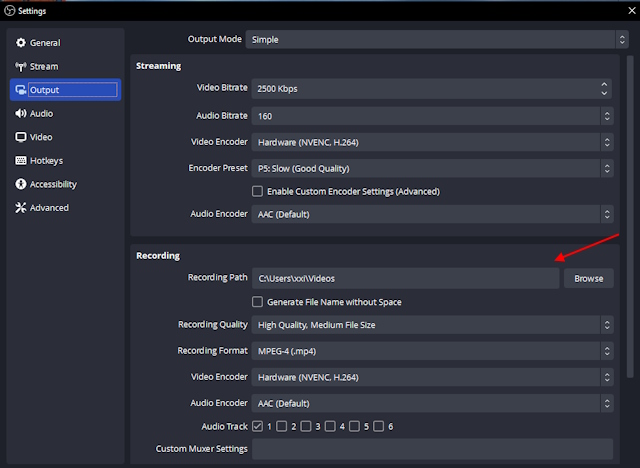
- First, click on the ‘Settings‘ button on the bottom right of the OBS.

- Once done, click on Output‘ from the sidebar, and then look for the ‘Recording‘ section.

- Now you can select the recording files path from here by either typing the path name or browsing the path location.
- You can also change the recording quality and recording format. But keeping it as we suggest will exactly do the job.
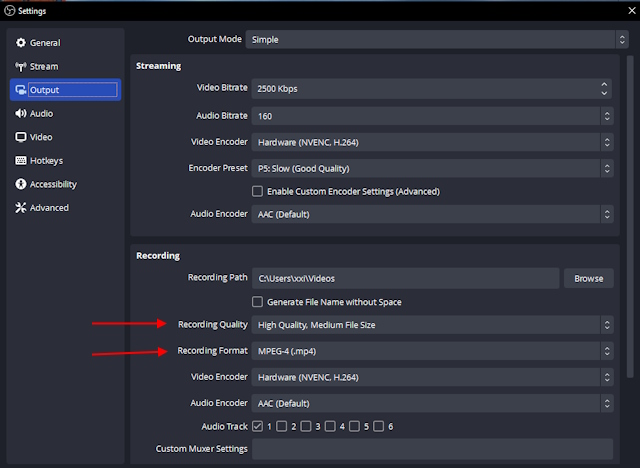
- Once all settings are done, click on Apply and OK, and you’re done!
- To start recording, you first need to navigate to the scene section on the bottom left of your screen. By default, OBS adds a scene. If it is not there, press the plus icon under the scene tab.

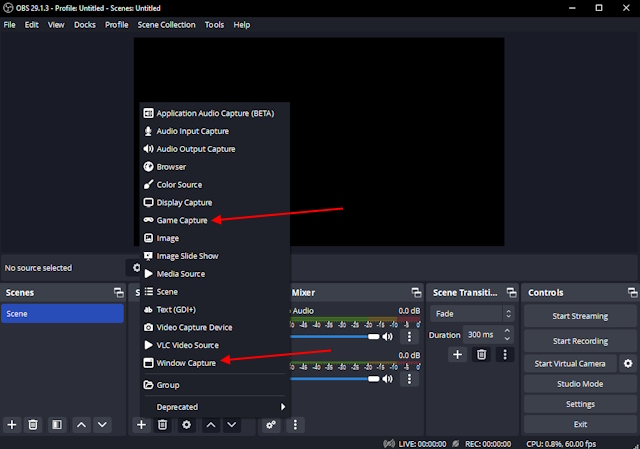
- After adding a scene, press the Plus icon on the sources tab.

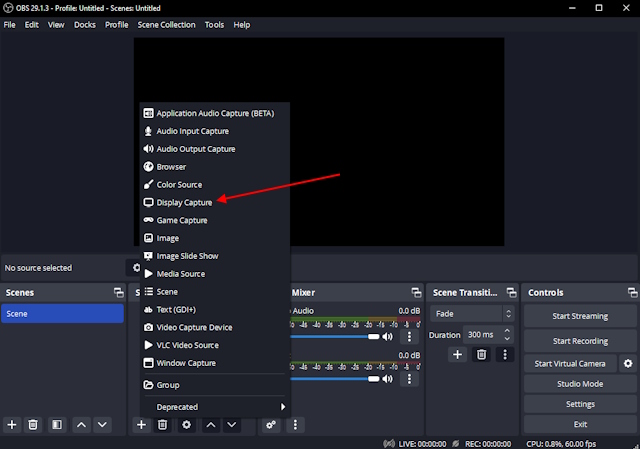
- It will open a large menu with a lot of options. Select ‘Display Capture‘
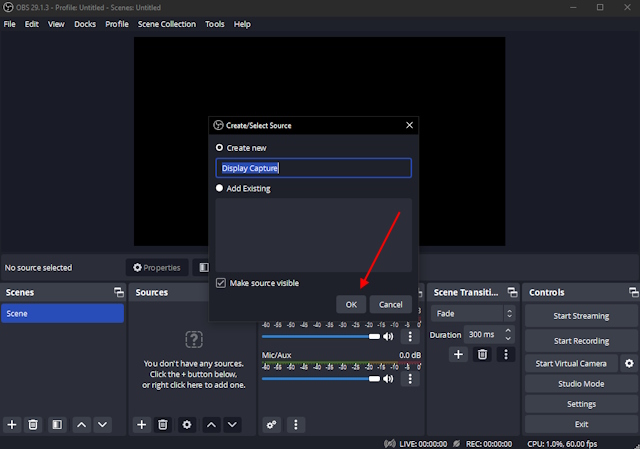
- A new pop-up window will come to confirm adding a new display capture source. Name it what you want and click on ‘OK.’
- Once confirmed, it will show which display you want to record. You can change the display you want to capture if you have multiple screens. Choose the right one and click on ‘OK’ again.

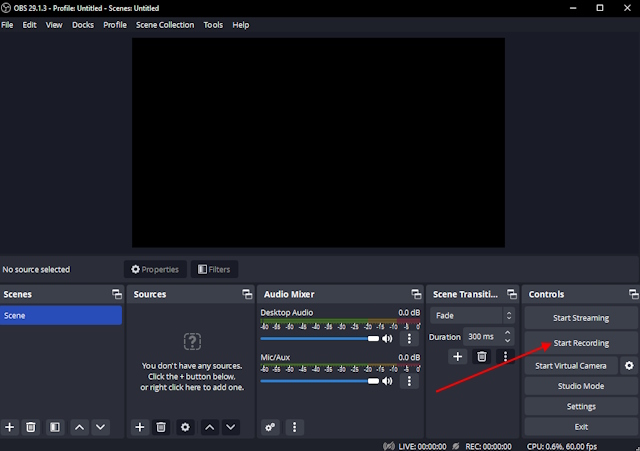
- Now that you have selected a display, navigate your cursor to the ‘Start recording‘ button on the bottom right and click once you are ready.
Specific Window Capture
Additionally, OBS also introduced ‘Game Capture’ and ‘Window Capture’ for specific game screens or application screen recordings without showing any crucial information on your display. Learn to set it up in this section.
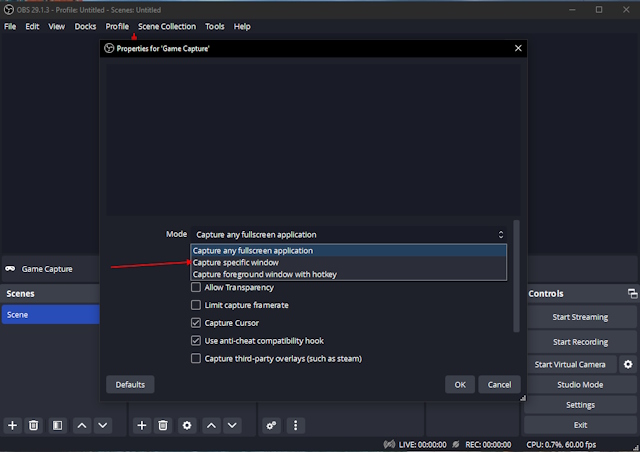
1. To record only a specific game screen, click the Game Capture or Capture specific window option.
2. Then select the game you want to record and click Start Recording.
Similarly, you can use Window Capture for any application window on OBS without recording the whole screen.